Builds: Difference between revisions
More actions
No edit summary |
m Typo and grammar fix |
||
| (37 intermediate revisions by 17 users not shown) | |||
| Line 1: | Line 1: | ||
You can create multiple contestants associated with either the Light, Medium, or Heavy Build. Each Build has | You can create multiple contestants associated with either the Light, Medium, or Heavy Build. Each Build has a unique selection of [[specializations]], [[weapons]] and [[gadgets]]. | ||
__TOC__ | |||
== Light Build == | == Light Build == | ||
{{Quote|text=Exceptionally fast, but low survivability. Executes hit-and-run tactics. Specializes in stealth and evasion.}} | {{Quote|text=Exceptionally fast, but low survivability. Executes hit-and-run tactics. Specializes in stealth and evasion.}} | ||
Light is the smallest and most mobile | The Light Build is the smallest, fastest, and most mobile of the three builds, excelling in swift repositioning and flanking maneuvers. However, this agility comes at a cost: Light has the lowest health, making direct combat risky. | ||
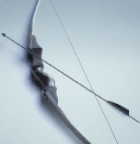
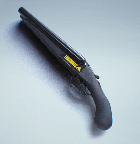
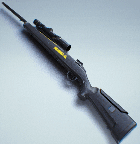
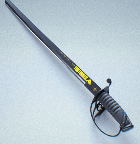
Lights wield a versatile arsenal, including close-range weapons with a high firing rate like the [[XP-54]] and [[M11]], as well as potent long-range options like the [[LH1]] and [[SR-84]]. They also carry melee weapons that are devastating in the right hands, with the [[Dagger]] having the capability of eliminating a contestant with a single backstab and the [[Sword]] possessing a lunge attack that can close distances between targets. Lights also possess more unconventional low-tech options such as the [[Recurve Bow]] and [[Throwing Knives]] for contestants who prefer projectile options over hitscan. | |||
[[ | |||
[[ | |||
[[ | Additionally, Light contestants can be seen with unique gadget options, like the [[Breach Charge]] to create new openings in surfaces and the [[Glitch Grenade]] to turn fights in their favor. | ||
With only '''150 HP''', Light Builds rely on speed, smart positioning, and quick disengages. However, they also have the fastest health regeneration, activating after '''7 seconds''' of avoiding damage.{{InfoGridCards|header1={{colored link|#f1f2f4|Specializations|Specializations}}|header2={{colored link|#f1f2f4|Weapons|Weapons}}|header3={{colored link|#f1f2f4|Gadgets|Gadgets}} | |||
|text1 = {{EquipmentCard | Image=Cloaking Device Rank 1.png | page=Cloaking Device | equipment-name=Cloaking Device}} | |||
{{EquipmentCard | Image=Evasive Dash Rank 1.png | page=Evasive Dash | equipment-name=Evasive Dash}} | |||
{{EquipmentCard | Image=Grappling Hook Rank 1.png | page=Grappling Hook | equipment-name=Grappling Hook}} | |||
||text2 = {{EquipmentCard | Image=93R Rank 1.png | page=93R | equipment-name=93R}} | |||
{{EquipmentCard | Image=Nama-404_Icon.png | page=ARN-220 | equipment-name=ARN-220}} | |||
{{EquipmentCard | Image=Dagger Rank 1.png | page=Dagger | equipment-name=Dagger}} | |||
{{EquipmentCard | Image=LH1 Rank 1.png | page=LH1 | equipment-name=LH1}} | |||
{{EquipmentCard | Image=M11 Rank 1.png | page=M11 | equipment-name=M11}} | |||
{{EquipmentCard | Image=M26 Matter Rank 1.png | page=M26 Matter | equipment-name=M26 Matter}} | |||
{{EquipmentCard | Image=Recurve Bow Rank 1.png | page=Recurve Bow | equipment-name=Recurve Bow}} | |||
{{EquipmentCard | Image=SH1900 Rank 1.png | page=SH1900 | equipment-name=SH1900}} | |||
{{EquipmentCard | Image=SR-84 Rank 1.png | page=SR-84 | equipment-name=SR-84}} | |||
{{EquipmentCard | Image=Sword Rank 1.png | page=Sword | equipment-name=Sword}} | |||
{{EquipmentCard | Image=V9S Rank 1.png | page=V9S | equipment-name=V9S}} | |||
{{EquipmentCard | Image=XP-54 Rank 1.png | page=XP-54 | equipment-name=XP-54}} | |||
{{EquipmentCard | Image=Throwing Knives Rank 1.png | page=Throwing Knives | equipment-name=Throwing Knives}} | |||
|text3 = {{EquipmentCard | Image=Breach Charge Rank 1.png | page=Breach Charge | equipment-name=Breach Charge}} | |||
{{EquipmentCard | Image=Flashbang Rank 1.png | page=Flashbang | equipment-name=Flashbang }} | |||
{{EquipmentCard | Image=Frag Grenade Rank 1.png | page=Frag Grenade | equipment-name=Frag Grenade}} | |||
{{EquipmentCard | Image=Gas Grenade Rank 1.png | page=Gas Grenade | equipment-name=Gas Grenade}} | |||
{{EquipmentCard | Image=Gateway Rank 1.png | page=Gateway | equipment-name=Gateway}} | |||
{{EquipmentCard | Image=Glitch Grenade Rank 1.png | page=Glitch Grenade | equipment-name=Glitch Grenade}} | |||
{{EquipmentCard | Image=Goo Grenade Rank 1.png | page=Goo Grenade | equipment-name=Goo Grenade}} | |||
{{EquipmentCard | Image=Gravity Vortex Rank 1.png | page=Gravity Vortex | equipment-name=Gravity Vortex}} | |||
{{EquipmentCard | Image=Pyro Grenade Rank 1.png | page=Pyro Grenade | equipment-name=Pyro Grenade}} | |||
{{EquipmentCard | Image=Smoke Grenade Rank 1.png | page=Smoke Grenade | equipment-name=Smoke Grenade}} | |||
{{EquipmentCard | Image=Sonar Grenade Rank 1.png | page=Sonar Grenade | equipment-name=Sonar Grenade}} | |||
{{EquipmentCard | Image=Stun Gun Maintenance.png | page=Stun Gun | equipment-name=Stun Gun}} | |||
{{EquipmentCard | Image=Thermal Bore Rank 1.png | page=Thermal Bore | equipment-name=Thermal Bore}} | |||
{{EquipmentCard | Image=Thermal Vision Rank 1.png | page=Thermal Vision | equipment-name=Thermal Vision}} | |||
{{EquipmentCard | Image=Tracking Dart Rank 1.png | page=Tracking Dart | equipment-name=Tracking Dart}} | |||
{{EquipmentCard | Image=Vanishing Bomb Rank 1.png | page=Vanishing Bomb | equipment-name=Vanishing Bomb}} | |||
}} | |||
==Medium Build== | |||
{{Quote|text=Excels in mid-range combat with average health and movement speed. Specializes in healing, scanning, or providing support.}} | |||
The Medium Build is the all-rounder, offering a mix of durability, mobility, and utility. Mediums are more resilient than Light Builds but move at a slower pace, with their loadout choices making them essential for supporting teammates while still holding their own in fights. | |||
Mediums boast a well-rounded loadout, with a key focus on support tools like the [[Healing Beam]] to sustain their team and the [[Defibrillator]] to speed up the revival process. They also possess mobility tools like the [[Jump Pad]] and [[Zipline]] that are similar to the ones you'd find in the arena, allowing them to reposition their team across wide stretches of terrain with ease. | |||
Mediums | |||
Medium contestants can carry a weapon for almost any playstyle, including close-range options like the [[Model 1887]], consistent mid-range damage with the [[AKM]] and [[FAMAS]], and even their own unique melee weapons like the [[Dual Blades]], which can reflect incoming bullets back at enemies. | |||
With '''250 HP''' and health regeneration activating after '''9 seconds''' of avoiding damage, Mediums strike the balance between health, mobility, and size.{{InfoGridCards|header1={{colored link|#f1f2f4|Specializations|Specializations}}|header2={{colored link|#f1f2f4|Weapons|Weapons}}|header3={{colored link|#f1f2f4|Gadgets|Gadgets}} | |||
|text1 = {{EquipmentCard | Image=Dematerializer Rank 1.png | page=Dematerializer | equipment-name=Dematerializer}} | |||
{{EquipmentCard | Image=Guardian Turret Rank 1.png | page=Guardian Turret | equipment-name=Guardian Turret}} | |||
{{EquipmentCard | Image=Healing Beam Rank 1.png | page=Healing Beam | equipment-name=Healing Beam}} | |||
{{EquipmentCard | Image=Recon Senses Maintenance.png | page=Recon Senses | equipment-name=Recon Senses}} | |||
|text2 = {{EquipmentCard | Image=AKM Rank 1.png | page=AKM | equipment-name=AKM}} | |||
{{EquipmentCard | Image=Nama-404_Icon.png | page=CB-01 Repeater | equipment-name=CB-01 Repeater}} | |||
{{EquipmentCard | Image=Cerberus 12GA Rank 1.png | page=Cerberus 12GA | equipment-name=Cerberus 12GA}} | |||
{{EquipmentCard | Image=CL-40 Rank 1.png | page=CL-40 | equipment-name=CL-40}} | |||
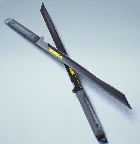
{{EquipmentCard | Image=Dual Blades Rank 1.png | page=Dual Blades | equipment-name=Dual Blades}} | |||
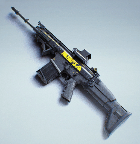
{{EquipmentCard | Image=FAMAS Rank 1.png | page=FAMAS | equipment-name=FAMAS}} | |||
{{EquipmentCard | Image=FCAR Rank 1.png | page=FCAR | equipment-name=FCAR}} | |||
{{EquipmentCard | Image=Model 1887 Rank 1.png | page=Model 1887 | equipment-name=Model 1887}} | |||
{{EquipmentCard | Image=Pike-556 Rank 1.png | page=Pike-556 | equipment-name=Pike-556}} | |||
{{EquipmentCard | Image=R .357 Rank 1.png | page=R.357 | equipment-name=R.357}} | |||
{{EquipmentCard | Image=Riot Shield Rank 1.png | page=Riot Shield | equipment-name=Riot Shield}} | |||
|text3 = {{EquipmentCard | Image=APS Turret Rank 1.png | page=APS Turret | equipment-name=APS Turret}} | |||
{{EquipmentCard | Image=Data Reshaper Rank 1.png | page=Data Reshaper | equipment-name=Data Reshaper}} | |||
{{EquipmentCard | Image=Defibrillator Rank 1.png | page=Defibrillator | equipment-name=Defibrillator }} | |||
{{EquipmentCard | Image=Explosive Mine Rank 1.png | page=Explosive Mine | equipment-name=Explosive Mine}} | |||
{{EquipmentCard | Image=Flashbang Rank 1.png | page=Flashbang | equipment-name=Flashbang }} | |||
{{EquipmentCard | Image=Frag Grenade Rank 1.png | page=Frag Grenade | equipment-name=Frag Grenade}} | |||
{{EquipmentCard | Image=Gas Grenade Rank 1.png | page=Gas Grenade | equipment-name=Gas Grenade}} | |||
{{EquipmentCard | Image=Gas Mine Rank 1.png | page=Gas Mine | equipment-name=Gas Mine}} | |||
{{EquipmentCard | Image=Glitch Trap Rank 1.png | page=Glitch Trap | equipment-name=Glitch Trap}} | |||
{{EquipmentCard | Image=Goo Grenade Rank 1.png | page=Goo Grenade | equipment-name=Goo Grenade}} | |||
{{EquipmentCard | Image=Jump Pad Rank 1.png | page=Jump Pad | equipment-name=Jump Pad}} | |||
{{EquipmentCard | Image=Motion Sensor Rank 1.png | page=Motion Sensor | equipment-name=Motion Sensor}} | |||
{{EquipmentCard | Image=Pyro Grenade Rank 1.png | page=Pyro Grenade | equipment-name=Pyro Grenade}} | |||
{{EquipmentCard | Image=Zipline Rank 1.png | page=Zipline | equipment-name=Zipline }} | |||
{{EquipmentCard | Image=Smoke Grenade Rank 1.png | page=Smoke Grenade | equipment-name=Smoke Grenade}} | |||
{{EquipmentCard | Image=Night Vision Maintenance.png | page=Night Vision | equipment-name=Night Vision}} | |||
}} | |||
==Heavy Build== | ==Heavy Build== | ||
{{Quote|text=High survivability. Low movement speed. Specializes in | {{Quote|text=High survivability. Low movement speed. Specializes in demolition and fortifications.}} | ||
The Heavy Build is | The Heavy Build is a powerhouse: Though slow-moving, it is the most durable Build, designed for taking and holding ground. With the highest health pool, Heavies thrive in direct combat and controlling objectives but struggle with mobility. | ||
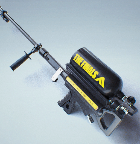
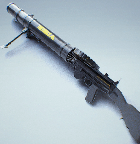
Heavies bring devastating equipment to the battlefield, like the [[Charge 'N' Slam]] and [[RPG-7]], capable of damaging enemies and obliterating structures. They also possess a wide array of defensive utility, like the [[Barricade]], [[Dome Shield]], and [[Mesh Shield]], all of which allow them to defend objectives and their teammates. Additionally, gadgets like the [[Lockbolt Launcher]] and [[Anti-Gravity Cube]] let them manipulate enemy movement and disrupt objectives. | |||
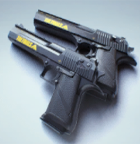
Heavy contestants favor close to mid-range weapons, from more traditional options like the [[M60]] and [[Lewis Gun]] to wildcards like the [[MGL32]]. They can also be seen with strong melee weapons, from the heavy-hitting [[Sledgehammer]] and swift [[Spear]], or even a [[Flamethrower]] for close-range pyrotechnics. | |||
Due to their size, Heavies cannot crouch or slide through vents, but they can vault onto elevated areas more easily and throw objects farther using the [[Gravity Glove]]. | |||
Boasting an impressive '''350 HP''', Heavies are the toughest build to bring down—but this comes at the cost of the slowest movement speed and largest hitbox. They also have the slowest health regeneration, requiring '''10 seconds''' without taking damage before healing begins.{{InfoGridCards|header1={{colored link|#f1f2f4|Specializations|Specializations}}|header2={{colored link|#f1f2f4|Weapons|Weapons}}|header3={{colored link|#f1f2f4|Gadgets|Gadgets}} | |||
|text1 = {{EquipmentCard | Image=Charge_N_Slam Rank 1.png | page=Charge_‘N’_Slam | equipment-name=Charge 'N' Slam}} | |||
{{EquipmentCard | Image=Goo Gun Rank 1.png | page=Goo Gun | equipment-name=Goo Gun}} | |||
{{EquipmentCard | Image=Mesh Shield Rank 1.png | page=Mesh Shield | equipment-name=Mesh Shield}} | |||
{{EquipmentCard | Image=Winch Claw Rank 1.png | page=Winch Claw | equipment-name=Winch Claw}} | |||
|text2 = {{EquipmentCard | Image=.50 Akimbo Rank 1.png | page=.50 Akimbo | equipment-name=.50 Akimbo}} | |||
{{EquipmentCard | Image=Flamethrower Rank 1.png | page=Flamethrower | equipment-name=Flamethrower }} | |||
{{EquipmentCard | Image=KS-23 Rank 1.png | page=KS-23 | equipment-name=KS-23}} | |||
{{EquipmentCard | Image=Lewis Gun Rank 1.png | page=Lewis Gun | equipment-name=Lewis Gun}} | |||
{{EquipmentCard | Image=Nama-404_Icon.png | page=M134 Minigun | equipment-name=M134 Minigun}} | |||
{{EquipmentCard | Image=M60 Rank 1.png | page=M60 | equipment-name=M60}} | |||
{{EquipmentCard | Image=MGL32 Rank 1.png | page=M32GL | equipment-name=M32GL}} | |||
{{EquipmentCard | Image=SA1216 Rank 1.png | page=SA1216 | equipment-name=SA1216}} | |||
{{EquipmentCard | Image=ShAK-50 Rank 1.png | page=ShAK-50 | equipment-name=ShAK-50}} | |||
{{EquipmentCard | Image=Sledgehammer Rank 1.png | page=Sledgehammer | equipment-name=Sledgehammer}} | |||
{{EquipmentCard | Image=Spear Rank 1.png | page=Spear | equipment-name=Spear}} | |||
|text3 = {{EquipmentCard | Image=Anti-Gravity Cube Rank 1.png | page=Anti-Gravity Cube | equipment-name=Anti-Gravity Cube}} | |||
{{EquipmentCard | Image=Barricade Rank 1.png | page=Barricade | equipment-name=Barricade}} | |||
{{EquipmentCard | Image=C4 Rank 1.png | page=C4 | equipment-name=C4}} | |||
{{EquipmentCard | Image=Dome Shield Rank 1.png | page=Dome Shield | equipment-name=Dome Shield}} | |||
{{EquipmentCard | Image=Explosive Mine Rank 1.png | page=Explosive Mine | equipment-name=Explosive Mine}} | |||
{{EquipmentCard | Image=Flashbang Rank 1.png | page=Flashbang | equipment-name=Flashbang }} | |||
{{EquipmentCard | Image=Frag Grenade Rank 1.png | page=Frag Grenade | equipment-name=Frag Grenade}} | |||
{{EquipmentCard | Image=Gas Grenade Rank 1.png | page=Gas Grenade | equipment-name=Gas Grenade}} | |||
{{EquipmentCard | Image=Goo Grenade Rank 1.png | page=Goo Grenade | equipment-name=Goo Grenade}} | |||
{{EquipmentCard | Image=Motion Sensor Rank 1.png | page=Motion Sensor | equipment-name=Motion Sensor}} | |||
{{EquipmentCard | Image=Pyro Grenade Rank 1.png | page=Pyro Grenade | equipment-name=Pyro Grenade}} | |||
{{EquipmentCard | Image=Pyro Mine Rank 1.png | page=Pyro Mine | equipment-name=Pyro Mine}} | |||
{{EquipmentCard | Image=RPG-7 Rank 1.png | page=RPG-7 | equipment-name=RPG-7}} | |||
{{EquipmentCard | Image=Smoke Grenade Rank 1.png | page=Smoke Grenade | equipment-name=Smoke Grenade}} | |||
{{EquipmentCard | Image=Lockbolt Launcher Rank 1.png | page=Lockbolt Launcher | equipment-name=Lockbolt Launcher}} | |||
{{EquipmentCard | Image=Night Vision Maintenance.png | page=Night Vision | equipment-name=Night Vision}} | |||
}} | |||
Latest revision as of 19:45, 31 March 2025
You can create multiple contestants associated with either the Light, Medium, or Heavy Build. Each Build has a unique selection of specializations, weapons and gadgets.
Light Build
edit edit source“Exceptionally fast, but low survivability. Executes hit-and-run tactics. Specializes in stealth and evasion.”
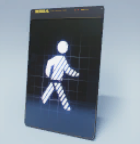
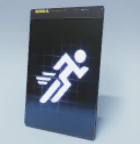
The Light Build is the smallest, fastest, and most mobile of the three builds, excelling in swift repositioning and flanking maneuvers. However, this agility comes at a cost: Light has the lowest health, making direct combat risky.
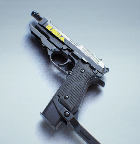
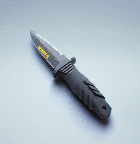
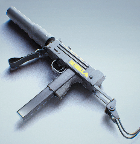
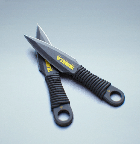
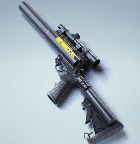
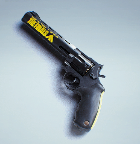
Lights wield a versatile arsenal, including close-range weapons with a high firing rate like the XP-54 and M11, as well as potent long-range options like the LH1 and SR-84. They also carry melee weapons that are devastating in the right hands, with the Dagger having the capability of eliminating a contestant with a single backstab and the Sword possessing a lunge attack that can close distances between targets. Lights also possess more unconventional low-tech options such as the Recurve Bow and Throwing Knives for contestants who prefer projectile options over hitscan.
Additionally, Light contestants can be seen with unique gadget options, like the Breach Charge to create new openings in surfaces and the Glitch Grenade to turn fights in their favor.
With only 150 HP, Light Builds rely on speed, smart positioning, and quick disengages. However, they also have the fastest health regeneration, activating after 7 seconds of avoiding damage.
Medium Build
edit edit source“Excels in mid-range combat with average health and movement speed. Specializes in healing, scanning, or providing support.”
The Medium Build is the all-rounder, offering a mix of durability, mobility, and utility. Mediums are more resilient than Light Builds but move at a slower pace, with their loadout choices making them essential for supporting teammates while still holding their own in fights.
Mediums boast a well-rounded loadout, with a key focus on support tools like the Healing Beam to sustain their team and the Defibrillator to speed up the revival process. They also possess mobility tools like the Jump Pad and Zipline that are similar to the ones you'd find in the arena, allowing them to reposition their team across wide stretches of terrain with ease.
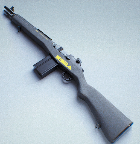
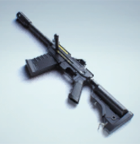
Medium contestants can carry a weapon for almost any playstyle, including close-range options like the Model 1887, consistent mid-range damage with the AKM and FAMAS, and even their own unique melee weapons like the Dual Blades, which can reflect incoming bullets back at enemies.
With 250 HP and health regeneration activating after 9 seconds of avoiding damage, Mediums strike the balance between health, mobility, and size.
Heavy Build
edit edit source“High survivability. Low movement speed. Specializes in demolition and fortifications.”
The Heavy Build is a powerhouse: Though slow-moving, it is the most durable Build, designed for taking and holding ground. With the highest health pool, Heavies thrive in direct combat and controlling objectives but struggle with mobility.
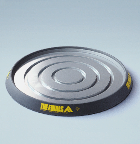
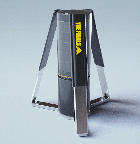
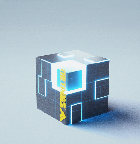
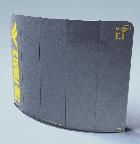
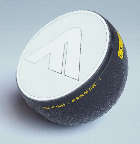
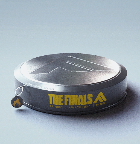
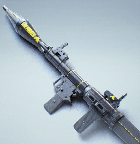
Heavies bring devastating equipment to the battlefield, like the Charge 'N' Slam and RPG-7, capable of damaging enemies and obliterating structures. They also possess a wide array of defensive utility, like the Barricade, Dome Shield, and Mesh Shield, all of which allow them to defend objectives and their teammates. Additionally, gadgets like the Lockbolt Launcher and Anti-Gravity Cube let them manipulate enemy movement and disrupt objectives.
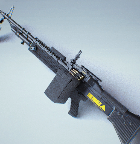
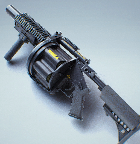
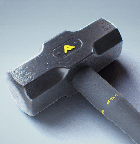
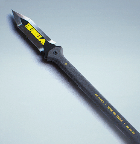
Heavy contestants favor close to mid-range weapons, from more traditional options like the M60 and Lewis Gun to wildcards like the MGL32. They can also be seen with strong melee weapons, from the heavy-hitting Sledgehammer and swift Spear, or even a Flamethrower for close-range pyrotechnics.
Due to their size, Heavies cannot crouch or slide through vents, but they can vault onto elevated areas more easily and throw objects farther using the Gravity Glove.
Boasting an impressive 350 HP, Heavies are the toughest build to bring down—but this comes at the cost of the slowest movement speed and largest hitbox. They also have the slowest health regeneration, requiring 10 seconds without taking damage before healing begins.
