-
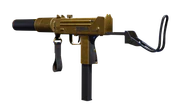
 CARTIRDGE GUNNER - S2 BP Level 24
 -
 CHARMALURE -
 600
600 -
 CLOSED BETA SHINE - CB1 Diamond
 -
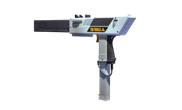
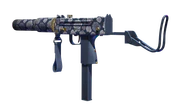
 DATA BREACH - 800
 -
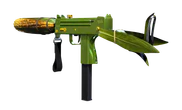
 EMERALD PRIME - S3 WT Emerald 3
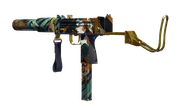
 -
 GINGER SNAPPER - 800
 -
 GLINT TINT - 2,200 (Bundle)
 -
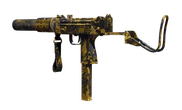
 HOLTOW FINE PRINT - 1,100 (Bundle)
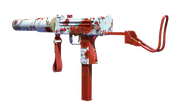
 -
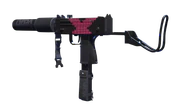
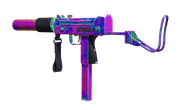
 ISEUL-T REALITY RECAST - 400
 -
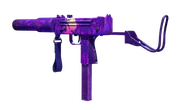
 L.E.DOWNSHIFT - 2,200 (Bundle)
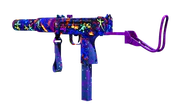
 -
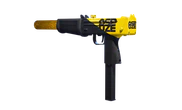
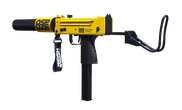
 OSPUZE GOLD POP - S4 BP Level 98
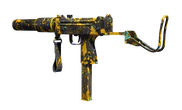
 -
 OSPUZE HYDRATION - S2 BP Level 105
 -
 OSPUZE POPPIN' - OB BP Level 5
 -
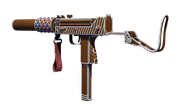
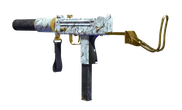
 S3 GILDED ENFORCER - S3 Gold
 -
 VIRTUAL VELOCITY - 1,150 (Bundle)
 -
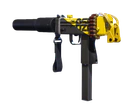
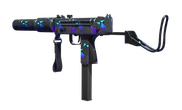
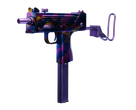
 KERNEL CARNAGE - 900
M11: Difference between revisions
From Test wiki
More actions
Wetbattery (talk | contribs) m →Sights |
|||
| (60 intermediate revisions by 14 users not shown) | |||
| Line 4: | Line 4: | ||
|weaponquote = {{Quote|text=Fast-firing, fully automatic machine pistol}} | |weaponquote = {{Quote|text=Fast-firing, fully automatic machine pistol}} | ||
|build=Light | |build=Light | ||
|wtype=SMG | |price={{Prices}} | ||
| | |wtype=[[:Category:SMG|SMG]] | ||
| | |bodydamage=16 | ||
| | |crit=24 | ||
|falloffmin=10m | |||
|falloffmax=17.5m | |||
|falloffmulti=0.52 | |||
|rpm=1000 | |||
|magsize=40 | |magsize=40 | ||
| | |fullreload=1.85s | ||
|tacreload=1.55s | |||
}} | }} | ||
The M11 is a | The [[M11]] ''(Military Armament Corporation '''M'''odel '''11''')'' is a [[Light]] class [[:Category:SMG|submachine gun]] designed to deal high close-distance burst damage. | ||
== Usage == | |||
The M11 can be selected as the [[Weapons|weapon]] of any [[Light]] build loadout. | |||
The trigger can be held to continuously fire bullets that damage opponents, also dealing additional damage on headshots. Aiming down sights increases the M11's accuracy. Moving decreases accuracy, especially when going airborne. | |||
The | |||
The weapon automatically reloads when its magazine is empty, or the user can do a tactical reload before this point. The user has unlimited spare ammunition. | |||
{{Control scheme|weapon=Equip [[M11]]|primary-fire=Fire shot <small>(Tap)</small><br>Continuous fire <small>(Hold)</small>|secondary-fire=Aim down sights <small>(Hold)</small>|reload=Tactical reload}} | |||
==Stats== | |||
=== Damage Profile === | |||
{| class="wikitable" style="text-align: center;" | |||
|- | |||
! Build !! HP !! Shots to kill !! Time to kill (Body) !! Time to kill (Crit) | |||
|- | |||
|Light||150 | |||
|10 | |||
|0.54 | |||
|0.36 | |||
|- | |||
|Medium||250 | |||
|16 | |||
|0.90 | |||
|0.60 | |||
|- | |||
|Heavy||350 | |||
|22 | |||
|1.26 | |||
|0.84 | |||
|- | |||
|colspan="5" |<small>Values are approximate and determined by community testing.</small> | |||
|- | |||
|} | |||
=== Sights === | |||
{{Main|Sights}} | |||
<div style="display:flex; flex-wrap:wrap; justify-content:center;"> | |||
{{Items_Display|image=Epic_IRON_SIGHTS-Sight.png|bar=FREE |color=blank|name=IRON SIGHTS}} | |||
{{Items_Display|image=Epic_COMPACT_REFLECTOR-Sight.png|bar={{VRIcon}} 300 |color=blank|name=COMPACT REFLECTOR}} | |||
{{Items_Display|image=Epic_HOLOGRAPHIC-Sight.png|bar={{VRIcon}} 300 |color=blank|name=HOLOGRAPHIC}} | |||
</div> | |||
=== Properties === | |||
''' Weapon '''<br><br> | |||
{{Feature icon|Ranged}} Strikes targets by aiming and firing at them from a distance. | |||
{{Feature icon|Automatic Fire}} Continues to fire automatically until the trigger is released. | |||
{{Feature icon|Aim Down Sights}} Has iron sights and optical sights that significantly increase accuracy when used. | |||
{{Feature icon|Full Reload}} Replaces the entire magazine in one animation on reload. | |||
{{Feature icon|Stable Accuracy|negative=true}} Suffers a significant decrease in accuracy while moving and while airborne. | |||
<br>''' Bullet '''<br><br> | |||
{{Feature icon|Hitscan}} Travels in a straight line, meaning there is no bullet drop. The direction will deviate from the crosshairs depending on accuracy. | |||
{{Feature icon|Critical Hit}} Critically hits on headshots, applying a damage multiplier. | |||
{{Feature icon|Mid Range Falloff}} Deals reduced damage when hitting targets at a moderate distance (falloff starts at less than 30m). | |||
{{Feature icon|Minor Structure Damage}} Damages structures. Takes a very long time to break a concrete wall. | |||
== Guide == | |||
''' Strengths ''' | |||
* The M11 is able to quickly burst down a target when up close. | |||
* The M11 has the highest rate of fire of any weapon. | |||
''' Weaknesses ''' | |||
* The M11's damage falls off quickly at moderate distances. Additionally, due to the M11's high bullet dispersion, hitting a target consistently from a distance is very difficult. | |||
''' Tactics ''' | |||
* Firing should always be done while aiming down sights, unless the target is extremely close. Doing so greatly increases the accuracy of the M11. | |||
* An M11 user should attempt to step in and out of combat to safely be able to deal damage, approaching opponents from unexpected angles so that they cannot retaliate. The moments of cover also serve to reload the weapon. | |||
''' Recoil ''' | |||
[[File:M11_recoil.png|400px|right]] | |||
How to control: | |||
# Pull down and left for the first 3 rounds | |||
# Pull down hard and slightly right until bullet 11 | |||
# Pull down slightly and directly to the left until round 19 | |||
# Pull down slightly and directly to the right until round 26 | |||
# Pull directly to the left until round 32 | |||
# The final 8 bullets have very little recoil | |||
''' Hitscan ''' | |||
*When the weapon fires a shot, a target is scanned for using a hitscan. This is a detection mechanism that scans in a straight line, meaning there is no bullet drop. The direction of this line will be deviate randomly from the direction of the crosshairs, depending on the accuracy level at the time of firing. | |||
*Immediately, the closest contestant, structure, object or shield intersecting the hitscan will be tagged as being struck. First, a bullet tracer animation quickly travels from the weapon to the hit location, then its effects are applied. This means it is possible for targets to be struck a few frames after they appear to take cover, as the hit is confirmed the moment the weapon is fired. | |||
== Item Mastery == | |||
Item mastery XP can be earned by damaging and eliminating opponents with the M11. | |||
Each time a certain XP threshold is reached, the item levels up. This does not improve the item, but rewards a unique item customization. | |||
{| class="wikitable" | |||
|- | |||
|colspan="2" |'''<center>XP Breakdown</center>''' | |||
|- | |||
!Source !!XP Reward | |||
|- | |||
|Damage dealt by the M11 | |||
|0.2 × Damage Dealt | |||
|- | |||
|Critical damage dealt by the M11 | |||
|0.2 × Critical Damage Dealt | |||
|- | |||
|Opponent eliminated by the M11 | |||
|50 | |||
|- | |||
|Assist on an opponent damaged by the M11 | |||
|20 | |||
|} | |||
{{Item Mastery|item=M11}} | |||
== Weapon Skins == | == Weapon Skins == | ||
<center> | |||
<tabber> | <tabber> | ||
|-|LEGENDARY= | |-|LEGENDARY= | ||
<gallery widths="210" heights="110" mode="nolines"> | <gallery widths="210" heights="110" mode="nolines"> | ||
File:M11_CARTIRDGE GUNNER.png|CARTIRDGE GUNNER - S2 BP Level 24 | |||
File:M11_CHARMALURE.png|CHARMALURE - {{MultibuckIcon}} 600 | |||
File:Closed Beta One Diamond Reward.png|CLOSED BETA SHINE - CB1 Diamond | |||
File:M11_DATA BREACH.png|DATA BREACH - {{MultibuckIcon}} 800 | |||
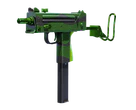
File:M11_S3 EMERALD.png|EMERALD PRIME - S3 WT Emerald 3 | |||
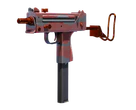
File:M11_GINGER SNAPPER.png|GINGER SNAPPER - {{MultibuckIcon}} 800 | |||
File:M11_Glint-Tint.png|GLINT TINT - {{MultibuckIcon}} 2,200 (Bundle) | File:M11_Glint-Tint.png|GLINT TINT - {{MultibuckIcon}} 2,200 (Bundle) | ||
File:M11_Holtow-Fine-Print.png|HOLTOW FINE PRINT - {{MultibuckIcon}} 1,100 (Bundle) | File:M11_Holtow-Fine-Print.png|HOLTOW FINE PRINT - {{MultibuckIcon}} 1,100 (Bundle) | ||
File:M11_ISEUL-T REALITY RECAST.png|ISEUL-T REALITY RECAST - {{MultibuckIcon}} 400 | |||
File:M11_L.E.DOWNSHIFT.png|L.E.DOWNSHIFT - {{MultibuckIcon}} 2,200 (Bundle) | |||
File:M11_OSPUZE GOLD POP.png|OSPUZE GOLD POP - S4 BP Level 98 | |||
File:M11_OSPUZE HYDRATION.png|OSPUZE HYDRATION - S2 BP Level 105 | |||
File:M11 - OPSUZE - CARBONATED.png|OSPUZE POPPIN' - OB BP Level 5 | File:M11 - OPSUZE - CARBONATED.png|OSPUZE POPPIN' - OB BP Level 5 | ||
File: | File:M11_S3 GOLD.png|S3 GILDED ENFORCER - S3 Gold | ||
File:M11_VIRTUAL VELOCITY.png|VIRTUAL VELOCITY - {{MultibuckIcon}} 1,150 (Bundle) | |||
File:M11_KERNEL_CARNAGE.png|KERNEL CARNAGE - {{MultibuckIcon}} 900 | |||
</gallery> | </gallery> | ||
|-|EPIC= | |-|EPIC= | ||
<gallery widths="210" heights="110" mode="nolines"> | <gallery widths="210" heights="110" mode="nolines"> | ||
File:M11_BED OF ROSES.png|BED OF ROSES - {{MultibuckIcon}} 1,150 (Bundle) | |||
File:M11_Decoded-Spirit.png|DECODED SPIRIT - {{MultibuckIcon}} 1,150 (Bundle) | File:M11_Decoded-Spirit.png|DECODED SPIRIT - {{MultibuckIcon}} 1,150 (Bundle) | ||
File:M11_KINRADE WARE.png|KINRADE WARE - S3 BP Level 1 | |||
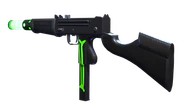
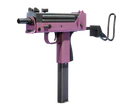
File:M11_LUMINOUS RIOT.png|LUMINOUS RIOT - {{MultibuckIcon}} 400 | |||
File:M11_MOMENTUM MARKER.png|MOMENTUM MARKER - S4 BP Level 1 | |||
File:M11 Marble-Majesty.png|MARBLE MAJESTY - {{MultibuckIcon}} 1,150 (Bundle) | File:M11 Marble-Majesty.png|MARBLE MAJESTY - {{MultibuckIcon}} 1,150 (Bundle) | ||
File:M11_SUNDOWN SIZZLE.png|SUNDOWN SIZZLE - S2 BP Level 2 | |||
File:M11_Tringle_Twinkle.png|TRINGLE TWINKLE - Weapon Level 6 | File:M11_Tringle_Twinkle.png|TRINGLE TWINKLE - Weapon Level 6 | ||
File:M11_PREDASHEEN.png|PREDASHEEN - Weapon Level 9 | |||
</gallery> | </gallery> | ||
|-|RARE= | |-|RARE= | ||
<gallery widths="210" heights="110" mode="nolines"> | <gallery widths="210" heights="110" mode="nolines"> | ||
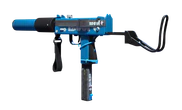
File:M11_Galaxy-Grid.png|GALAXY GRID - {{MultibuckIcon}} 150 | |||
File:M11_OSPUZE OPENER.png|OSPUZE OPENER | |||
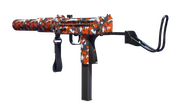
File:M11_PAINTED PREDATOR.png|PAINTED PREDATOR - Weapon Level 8 | |||
File:M11_Posh-Terrazzo.png|POSH TERRAZZO - {{MultibuckIcon}} 150 | File:M11_Posh-Terrazzo.png|POSH TERRAZZO - {{MultibuckIcon}} 150 | ||
File: | <!-- MISSING: File:M11_STRIPED GRAZER.png|STRIPED GRAZER - Weapon Level 7 --> | ||
</gallery> | </gallery> | ||
|-|COMMON= | |-|COMMON= | ||
<gallery widths="210" heights="110" mode="nolines"> | <gallery widths="210" heights="110" mode="nolines"> | ||
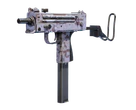
File:M11 - DYE JOB.png|DYE JOB - Weapon Level 2 | |||
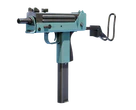
File:M11 - DYE JOB.png|DYE JOB | File:M11 DJ Blue.png|DYE JOB - Weapon Level 3 | ||
File:M11 DJ Blue.png|DYE JOB | File:M11 DJ Red.png|DYE JOB - Weapon Level 4 | ||
File:M11 DJ Red.png|DYE JOB | File:M11_Dye-Job-White.png|DYE JOB - Weapon Level 5 | ||
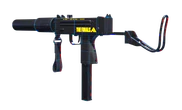
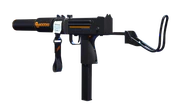
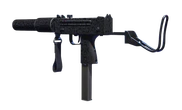
File:M11_Dye-Job-White.png|DYE JOB | File:M11 - STANDARD ISSUE.png|STANDARD ISSUE | ||
</gallery> | </gallery> | ||
| Line 67: | Line 197: | ||
</gallery> | </gallery> | ||
</tabber> | </tabber> | ||
</center> | |||
== Gallery == | |||
<gallery mode="nolines" class="scroll-gallery" widths="512px"> | |||
File:Weapons Light M11 CartridgeGunner.mp4|CARITAGE GUNNER skin animations. | |||
</gallery> | |||
== Trivia == | == Trivia == | ||
* The M11 | * The M11 exists in real life as the [https://en.wikipedia.org/wiki/MAC-11 MAC-11] machine pistol/submachine gun. The pistol was developed in the 1972 in Georgia, United States, at the Military Armament Corporation (MAC). "M11" stands for "Model 11". | ||
* The suppressor on the M11 is modeled after the MAC-10's companion Sionics suppressor. | |||
** Prior to the [[Pre-Release#Open Beta|Open Beta]], the M11 had no suppressor. | |||
** See also: [[List of Gun Origins]]. | |||
[[Category:Light Build]] | [[Category:Light Build]] | ||
[[Category:Weapon]] | [[Category:Weapon]] | ||
[[Category:SMG]] | |||
== History == | |||
{| class="wikitable" | |||
!Patch !!<center>Changes</center> | |||
|- | |||
|[[Update:6.0.0|6.0.0]] || | |||
*Increased damage falloff max range from 15m to 17.5m, giving the weapon a slightly longer effective range | |||
*Decreased damage falloff multiplier from 0.62 to 0.52, meaning the weapon now does slightly less damage at range | |||
|- | |||
|[[Update:2.0.0|2.0.0]] || | |||
*Increased accuracy by decreasing bullet dispersion when firing from the hip | |||
|- | |||
|[[Update:1.5.0|1.5.0]] || | |||
*Recoil pattern updated, to make the weapon easier to control | |||
|- | |||
|[[Update:1.4.0|1.4.0]] || | |||
*M11 damage increased to 16 from 15 | |||
|- | |||
|} | |||
Latest revision as of 13:29, 29 March 2025
 | |
| M11 | |
|---|---|
| |
| - | |
| Magazine Size | 40 |
| Price | Free |
| General Data | |
| Related Quests | |
The M11 (Military Armament Corporation Model 11) is a Light class submachine gun designed to deal high close-distance burst damage.
Usage
edit edit sourceThe M11 can be selected as the weapon of any Light build loadout.
The trigger can be held to continuously fire bullets that damage opponents, also dealing additional damage on headshots. Aiming down sights increases the M11's accuracy. Moving decreases accuracy, especially when going airborne.
The weapon automatically reloads when its magazine is empty, or the user can do a tactical reload before this point. The user has unlimited spare ammunition.
| Controls | PC | PS | XBox | Key |
|---|---|---|---|---|
| Equip M11 | 1 | Weapon | ||
| Fire shot (Tap) Continuous fire (Hold) | R2 | RT | Primary fire | |
| Aim down sights (Hold) | L2 | LT | Secondary fire | |
| Tactical reload | R | Reload |
Stats
edit edit sourceDamage Profile
edit edit source| Build | HP | Shots to kill | Time to kill (Body) | Time to kill (Crit) |
|---|---|---|---|---|
| Light | 150 | 10 | 0.54 | 0.36 |
| Medium | 250 | 16 | 0.90 | 0.60 |
| Heavy | 350 | 22 | 1.26 | 0.84 |
| Values are approximate and determined by community testing. | ||||
Sights
edit edit sourceMain Page: Sights

FREE
IRON SIGHTS

COMPACT REFLECTOR

HOLOGRAPHIC
Properties
edit edit source Weapon
![]() Ranged — Strikes targets by aiming and firing at them from a distance.
Ranged — Strikes targets by aiming and firing at them from a distance.
![]() Automatic Fire — Continues to fire automatically until the trigger is released.
Automatic Fire — Continues to fire automatically until the trigger is released.
![]() Aim Down Sights — Has iron sights and optical sights that significantly increase accuracy when used.
Aim Down Sights — Has iron sights and optical sights that significantly increase accuracy when used.
![]() Full Reload — Replaces the entire magazine in one animation on reload.
Full Reload — Replaces the entire magazine in one animation on reload.
![]() Unstable Accuracy — Suffers a significant decrease in accuracy while moving and while airborne.
Unstable Accuracy — Suffers a significant decrease in accuracy while moving and while airborne.
Bullet
![]() Hitscan — Travels in a straight line, meaning there is no bullet drop. The direction will deviate from the crosshairs depending on accuracy.
Hitscan — Travels in a straight line, meaning there is no bullet drop. The direction will deviate from the crosshairs depending on accuracy.
![]() Critical Hit — Critically hits on headshots, applying a damage multiplier.
Critical Hit — Critically hits on headshots, applying a damage multiplier.
![]() Mid Range Falloff — Deals reduced damage when hitting targets at a moderate distance (falloff starts at less than 30m).
Mid Range Falloff — Deals reduced damage when hitting targets at a moderate distance (falloff starts at less than 30m).
![]() Minor Structure Damage — Damages structures. Takes a very long time to break a concrete wall.
Minor Structure Damage — Damages structures. Takes a very long time to break a concrete wall.
Guide
edit edit sourceStrengths
- The M11 is able to quickly burst down a target when up close.
- The M11 has the highest rate of fire of any weapon.
Weaknesses
- The M11's damage falls off quickly at moderate distances. Additionally, due to the M11's high bullet dispersion, hitting a target consistently from a distance is very difficult.
Tactics
- Firing should always be done while aiming down sights, unless the target is extremely close. Doing so greatly increases the accuracy of the M11.
- An M11 user should attempt to step in and out of combat to safely be able to deal damage, approaching opponents from unexpected angles so that they cannot retaliate. The moments of cover also serve to reload the weapon.
Recoil

How to control:
- Pull down and left for the first 3 rounds
- Pull down hard and slightly right until bullet 11
- Pull down slightly and directly to the left until round 19
- Pull down slightly and directly to the right until round 26
- Pull directly to the left until round 32
- The final 8 bullets have very little recoil
Hitscan
- When the weapon fires a shot, a target is scanned for using a hitscan. This is a detection mechanism that scans in a straight line, meaning there is no bullet drop. The direction of this line will be deviate randomly from the direction of the crosshairs, depending on the accuracy level at the time of firing.
- Immediately, the closest contestant, structure, object or shield intersecting the hitscan will be tagged as being struck. First, a bullet tracer animation quickly travels from the weapon to the hit location, then its effects are applied. This means it is possible for targets to be struck a few frames after they appear to take cover, as the hit is confirmed the moment the weapon is fired.
Item Mastery
edit edit sourceItem mastery XP can be earned by damaging and eliminating opponents with the M11.
Each time a certain XP threshold is reached, the item levels up. This does not improve the item, but rewards a unique item customization.
| Source | XP Reward |
|---|---|
| Damage dealt by the M11 | 0.2 × Damage Dealt |
| Critical damage dealt by the M11 | 0.2 × Critical Damage Dealt |
| Opponent eliminated by the M11 | 50 |
| Assist on an opponent damaged by the M11 | 20 |
Level 1 0 XP
M11 |
Level 2 9,000 XP
Dye Job (Yellow) |
Level 3 9,000 XP
Dye Job (Blue) |
Level 4 36,000 XP
Dye Job (Red) |
Level 5 54,000 XP
Dye Job (White) |
Level 6 162,000 XP
Triangle Twinkle |
Level 7 144,000 XP
Striped Grazer |
Level 8 136,000 XP
Painted Predator |
Level 9 200,000 XP
Predasheen |
Weapon Skins
edit edit source


-
 BED OF ROSES - 1,150 (Bundle)
 -
 DECODED SPIRIT - 1,150 (Bundle)
 -
 KINRADE WARE - S3 BP Level 1
 -
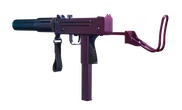
 LUMINOUS RIOT - 400
 -
 MOMENTUM MARKER - S4 BP Level 1
 -
 MARBLE MAJESTY - 1,150 (Bundle)
 -
 SUNDOWN SIZZLE - S2 BP Level 2
 -
 TRINGLE TWINKLE - Weapon Level 6
 -
 PREDASHEEN - Weapon Level 9


-
 GALAXY GRID - 150
 -
 OSPUZE OPENER
 -
 PAINTED PREDATOR - Weapon Level 8
 -
 POSH TERRAZZO - 150


-
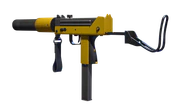 DYE JOB - Weapon Level 2
 -
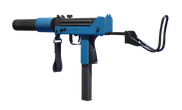 DYE JOB - Weapon Level 3
 -
 DYE JOB - Weapon Level 4
 -
 DYE JOB - Weapon Level 5
 -
 STANDARD ISSUE


-
 ISEUL-T UNFORBIDDEN - 5 VR
 -
 GLASS TINT - ?
 -
 ROLLING ROPES - ?
 -
 ROLLING ROPES - GREEN - ?
 -
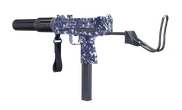
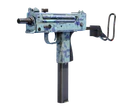
 WARPED MONITOR - 2100 C
 -
 DIGITAL DISRUPTION - ?
 -
 DIGITAL DISRUPTION - PINK - ?
 -
 DYE JOB - CYAN - FREE
 -
 DYE JOB - PINK - FREE


Gallery
edit edit source-
CARITAGE GUNNER skin animations.
Trivia
edit edit source- The M11 exists in real life as the MAC-11 machine pistol/submachine gun. The pistol was developed in the 1972 in Georgia, United States, at the Military Armament Corporation (MAC). "M11" stands for "Model 11".
- The suppressor on the M11 is modeled after the MAC-10's companion Sionics suppressor.
- Prior to the Open Beta, the M11 had no suppressor.
- See also: List of Gun Origins.
History
edit edit source| Patch | |
|---|---|
| 6.0.0 |
|
| 2.0.0 |
|
| 1.5.0 |
|
| 1.4.0 |
|